Now that I've deployed a receiver, how do I get tag detections from it?
A software package for processing raw sensorgnome data yourself is in the works, but not ready for end users.
So the current procedure, which allows us to detect anyone's tag on anyone's receiver is:
- download raw data from your receiver, including even files that have incorrect dates (e.g. 2000-01-01)
- use 7zip to store raw data files into a single compressed archive, ideally one archive per receiver
- send to or share with us the archive(s) via wetransfer, dropbox, google drive, or, if under 30 MB, email (jbrzusto AT fastmail DOT fm)
- we'll send you all detections of your tags in raw data received from everyone's receivers to date
- any detections of other people's tags in your raw data will be sent to them
- Please do not rename any of the files! Most of the filename is automatically generated, and the short label at the
beginning is not definitive, but there just to help you keep these files organized.
If you want us to process data from a receiver several times during a field season, please send incremental archives that
don't overlap too much with previous transfers, to keep network and storage usage down. We recommend sending
data from all new days, as well as from the last day of the previous transfer, but the software can deal with any amount of
overlap between consecutive transfers.
Why does my receiver tuned to 166.380 MHz detect tags at 166.300 MHz ('cross-frequency' detections)?
Due to the shape of pulses transmitted by tags, some energy is output at higher frequencies ("harmonics") than the nominal one. So, some of the energy emitted by tags at 166.300 MHz is in the range detected by a receiver tuned to 166.380 MHz. In principal, all tags at 166.300 MHz could be detected with the receiver tuned to 166.380 MHz, but at considerably lower signal strength (say 10 to 15 dB).
In our first approach to processing data, these harmonics did not result in tag detections, because our algorithm only sought registered tags by nominal frequency, so that when the receiver was known to be at 166.380 MHz, we only tried to detect tags registered at 166.380, not at 166.300. However, now we explicitly look for these cross-frequency detections (by making copies at 166.380 of tag database records at 166.300 ), and label their antenna port with an "x" to indicate that fact. So, e.g. tag 119 detected on antenna port "3x" means the tag is at 166.300 MHz but that the receiver on port 3 was tuned to 166.380 MHz when the tag was detected. This has led to detections of birds @ 166.300 on receivers tuned exclusiverly to 166.380 MHz,
and will also help those trying to use simultaneous detections on multiple antennas for tag localization.
Why do I see detections of tag X when I haven't deployed it yet? I notice that someone else is also using tag X, but with a different burst interval and/or on a different frequency.
In 2013, our database has some IDs with multiple physical tags. These differ in either frequency or burst interval. Normally, we should be able to distinguish among these because we insist on seeing at least two bursts from a given tag before we register a detection, and the interval between the bursts must be a multiple of the registered burst interval. But in a few cases, the burst interval of tags X and X' are "compatible": a small multiple of one burst interval adds up to the same length of time as a small multiple of the other.
For example, we have two tags with ID 11:
tag 11  @ 166.380 MHz: burst interval 6.0 seconds
tag 11' @ 166.300 MHz: burst interval 7.2 seconds
This means that 6 bursts of tag 11 = 36 seconds = 5 bursts of tag 11'.
Our algorithm allows for missing bursts, so a long run of consecutive bursts from tag 11
can look like a sparse run of bursts from tag 11':
Tag 11  bursts:   B-B-B-B-B-B-B-B-B-B-B-B-B-B-B-B-B-B-B-B-B-B-B-B-B-B-B ...

  looks like:

Tag 11' bursts:   B-----------B-----------B-----------B-----------B---- ...
                   (4 missing) (4 missing) (4 missing) (4 missing)
because the time between yellow bursts of tag 11 equals the time between every
5th burst of tag 11'. So we may see cross-frequency detections of tag 11' even though only tag 11 is present.
This will only happen occasionally, as "denser" sequences of bursts are preferred by the tag extraction algorithm.
However, to minimize such coincidences, the maximum number of missing bursts allowed
by the tag extraction algorithm can be chosen so that no pairs of tags on different frequencies are related this way.
If biological or other factors make it unlike that both tags X and X' will get within range of a given receiver,
we can aim for "bonus" detections (i.e. deliberately look for your 166.300 MHz tag even while the receiver
is tuned to 166.380 MHz). We can do this by duplicating database records for 166.300 tags, but with the nominal frequency
set to 166.380 MHz. Because the signal strengh is lower, and because most people doing frequency switching
do so at short time intervals, this is unlikely to result in new presence records. However, it may be useful when
doing direction finding using simultaneous detections by multiple receivers.
What are these tag IDs > 999?
Our data processing allows us to distinguish tags with the same ID and nominal frequency but suitably different burst intervals
(see the discussion above). In some cases, different projects have deployed tags with the same ID and frequency, so we have
chosen to add a leading 4th digit to the tag code in our master (cross-project) database. When you receive detections resulting
from your datasets run against the master database, you might see such 4-digit codes.
So, for example, tags 44 and 1044 correspond to tags with the same ID and nominal frequency, but deployed by different
projects. One has a burst interval of 7.7 seconds, the other of 8.9, so that they are not compatible (no small integer multiple of
one burst interval is very close to a small integer multiple of the other). This means our processing algorithm can easily
distinguish which of the two tags is being detected, provided we see multiple bursts. in fact, we can distinguish them even
if they are both present, again provided we see multiple bursts from each.
Users can examine the master tag database to verify that all their tags are present, and to check which 4-digit ID
is theirs in the case of multiple tags with the same ID and frequency.
Also, tags with IDs 8000 and above are cross-frequency records: record 8XXX @ 166.380 is a cross-frequency duplicate of record XXX @ 166.300
Can I use a powered USB extension cable to position the funcubedongle receiver at the antenna?
Yes. You can also a short passive USB extension cable to place the funcubedongle just outside the sensorgnome box.
Advantages:
- ~2 watts of heat generated by the funcubedongle are dissipated outside the sensorgnome case, rather than inside; higher case temperatures are more likely to lead to failure of non-industrial-rated components such as the USB hub or memory sticks
- most of the signal path between antenna and sensorgnome computer will be lossless digital (USB cable) rather than lossy and variable (analogue antenna cable)
- fewer analog adaptors/connectors between antenna and funcubedongle; each such junction reduces signal strength to some extent. Depending on the antenna, you may be able to connect it directly to the funcubedongle's SMA connector without any adapters.
Disadvantages:
- additional power is required to run the extension, which is an active component. In lab tests, one 12 metre extension cable increased power consumption by 0.6 watts; i.e. from 0.339 A to 0.457 A @ 5.06 V. [Does not apply to a short passive extension cable].
- the funcubedongle and its antenna and USB connections must be weather-proofed
- if the funcubedongle fails, it will be harder to swap it out if it is at the top of an antenna tower. [Does not apply to a short passive extension cable]
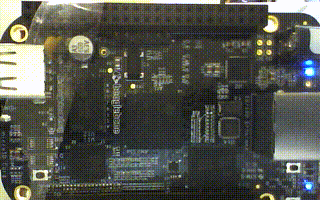
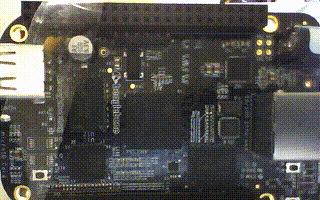
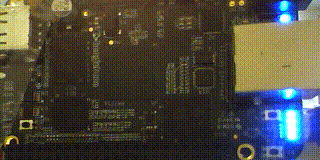
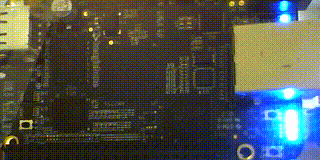
What do the different patterns of LED blinking mean?
Here are known LED blinking patterns and what they mean: (follow links to see animated versions)
- heartbeat: regular double flash of a single LED. This indicates the beaglebone is computing normally.
Note: This is what you should see when a running unit is checked in the field.
- sputtering: two or three LEDs blinking in a semi-random pattern, as in the latter part of the linked animation. This can last up to a minute when the Sensorgnome is powered up, after which the pattern should change to a heartbeat. [Note: this is a large animation which must be downloaded to be viewed.]
- 4-flash (BBB only): all four LEDs flashing in unison. This lasts 10 to 20 seconds, and only happens when you try to update a beaglebone black by booting with a micro SD card. This is to warn you that you'll be re-writing the internal flash drive on the BBB - you can cancel by unplugging the power and USB cables.
- crawl (BBB only): all four LEDs participate in a pattern that should look like a crawling bar. This indicates the internal flash drifve is being updated from the micro SD card.
- 4-steady (BBB only): all four LEDS on steadily. This indicates that updating of the internal flash drive from the micro SD card is complete. You should now power down the BBB, remove the micro SD card, and reboot.
Any other patterns almost certainly indicate the unit has malfunctioned and is not gathering data.
How do I deal with the following error when trying to connect my Windows 10 laptop to an SG for data download?
"The mapped network drive could not be created because the following error has occurred:
A specified logon session does not exist. It may already have been terminated."
- Launch the "Credential Manager" in Windows 10 (search for it in the start menu)
- Open "Windows Credentials"
- Click "Add a Windows credential"
- Internet or Network Address: \192.168.7.2 (USB connection) or \192.168.9.2 (Ethernet connecion)
- User name: 192.168.7.2\bone or 192.168.9.2\bone
- Password: bone
Question and answer courtesy of Michael Soares.